Kowloon walled City Miniature Part 1: Project info & Early blockouts
What is Kowloon walled city?
This city had its small beginnings as an outpost to manage trade for the song dynasty around 960-1279, not much happened to the location up until 1810 where a fort was established. Later on the Qing government would moved the fort to Kowloon bay & after the signing of the Nanjing Treaty in 1842, the location was expanded & renamed as Kowloon walled Village 5 years later. Fast forward a few years & land was being surrendered to the British during their occupation, while the perimeter was being modified in Kowloon to protect against the takeovers, eventually the British would take over the village turned fort while remaining as Chinese territory. As the British tried to remove the officials and civilians to no luck they abandoned the city. From there the city started to build a new reputation by the end of 1945, the city became a safe haven for crime and poverty and over time structures became more compact and dense. This place wasn't just a crime filled city, there were other establishments like hospitals, factories, repair sectors, even a kindergarten & oldfolks homes that provided a way to make a living for the 33,000 people living here.
Around 1994 there were plans to demolish Kowloon and a compensation program of 3.2 Billion for the residents and business owners. Since then a Park opened in its place in 1995 where the only existing building left standing within the park was The Yamen, this was the officials office & residences of higher ups that were located in the center of the city.
Why I started on this project?
Two years back I was watching a documentary on Kowloon and the thing I liked most about the city was the way things were constructed in an improvised way in some parts of the city, that with the visual density of apartments and buildings captured my imagination & made me want to do further research on this place. With the info that was out there I managed to find a few references & a map of the city which inspired me to begin work on this hobby project.
Early Blockouts:
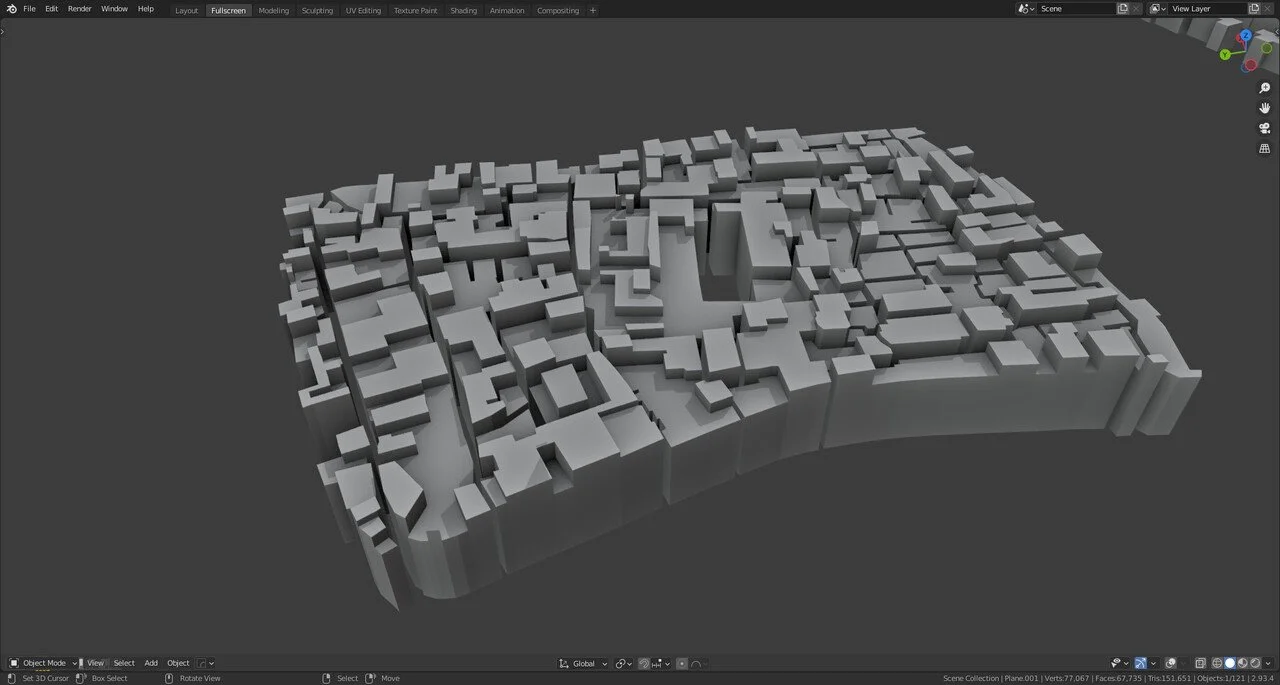
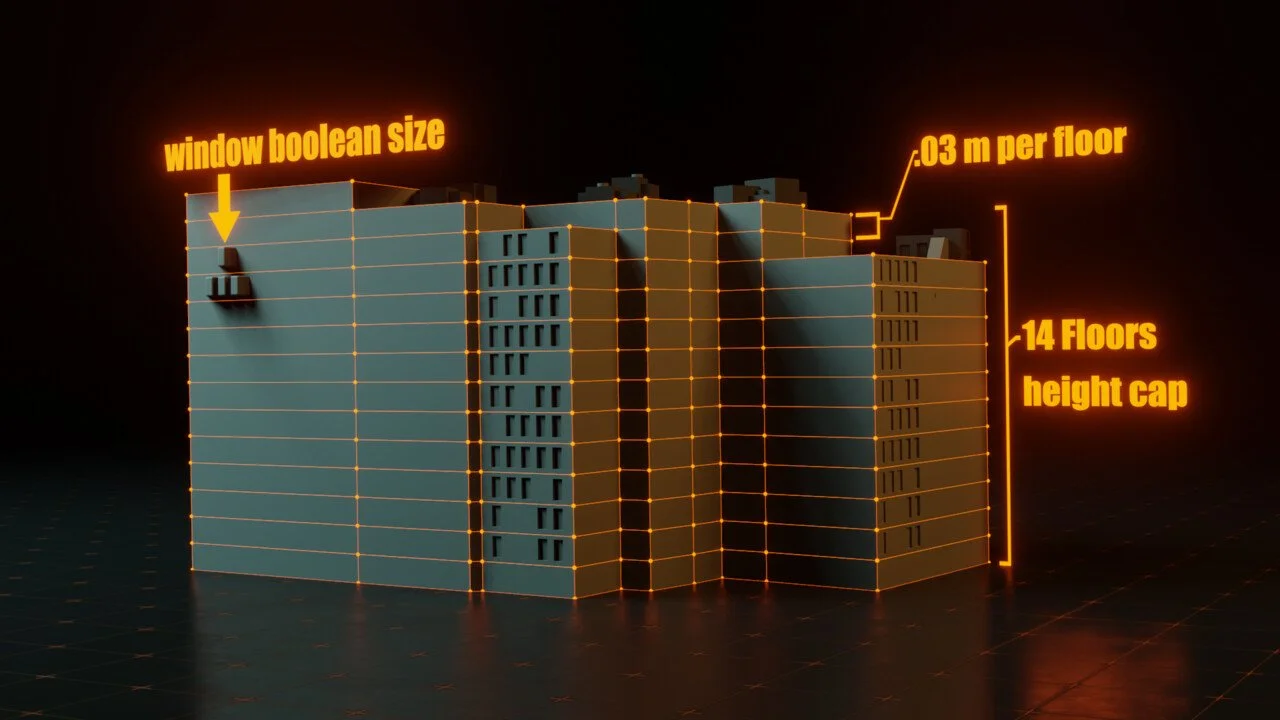
The way I started work on the project was to use the map of the city to trace out the buildings & then extrude the faces to specific height guidelines, the height limit for the city itself was capped at 14 floors because there was an airport right next door and having the buildings go any higher would have risk airplane collisions.
Windows & Detail
For the initial window detail I wanted to use booleans to get quick window cutouts and the way I did so was to make sure that the cutout shape was within size of the 0.03m metric of each floor, with that in mind I was able to make a series of mini boolean kits & started cutting windows into a test building.
Other small boolean details I wanted to keep in mind was the alleyway tunnels that cut through some buildings, doing some test prints helped me decide how and when I should add alleyway detail.
How do I make sure the detail show through on a print?
Having detail show through in each model was one of my biggest concerns with the project early on so the best way to figure this out without wasting a lot of plastic & reprint time was to run the model through a slicer program ( using the Cura slicer software), doing so allowed me to see which details showed through and which didn't, and the details that didn't show through I would adjust certain parts of the model to fix the issue. I got to a point where I was reusing a library of Booleans on the models & didn't really have to worry much about the detail errors.
Hopefully this breakdown gives a better insight on the project, for now this is 1 part of a 3 part breakdown & the things I plan on going over in part 2 will go over a few details on the greeble process, testprints of the models, and how I kept track of the detailing process of each building.
Want to learn more about this city?
https://tomorrow.city/a/kowloon-walled-city-and-population-density
https://www.youtube.com/watch?v=PcSBOUpgngM
Extra stuff:


